The purpose of this post is to share how I have started my regenerative garden. My regenerative garden is only one example of what is possible. There are a multitude of ways to start a regenerative garden. Hopefully, by the end of this post you will be encouraged to start your own.
Start a Regenerative Garden in 5 steps
Here is a quick review of how I started my regenerative garden. As a beginner gardener I referred to Green America’s Beginner’s Guide and The Old Farmer’s Almanac to set up my garden beds. Based on their information these are the 5 steps I took. First, I set some garden goals. Second, I chose an area for a garden bed. Third, I had the soil tested. Fourth, I prepared my garden beds using a No-Dig/No-Till method. Finally, I planned out the plants I’d like to grow. The following are the steps in more detail.
1. Set Garden Goals
I set two goals for my regenerative garden: 1) grow food and 2) grow plants for pollinators.
Fresh vegetables from the garden is one of my favorite things. Growing up my parents had and still do have vegetable and flower gardens. Every season has it’s own favorites. On a hot summer day I savor my Dad’s fresh tomato sandwiches. While in the winter a steaming bowl of my Mom’s collards melts the chill. I am definitely someone who lives to eat, so being able to grow my own food speaks to me. This is why goal number 1 is to grow food.
Goal number 2 is to grow plants for pollinators. I appreciate the vital role of pollinators like monarchs and honey bees. Growing food for pollinators helps restore pollinator populations.
What excites you about starting a regenerative garden? What do you want to grow in your garden? Would you like to grow fresh herbs? Or grow a tea garden? Or your pick of vibrant flowers to brighten your home? Set your garden goals and grow for it!
2. Choose an Area for a Garden Bed
Green America recommends for beginner gardeners to choose an area they can see from their kitchen. They also recommend to consider water source and hours of sunlight the area has. Additionally, for beginner gardeners they recommend a garden bed that is about 10 square feet.
I chose two different areas for my gardens. One I can see from my kitchen, which is about 5 sq feet. The other is closer to the compost bin and is about 10 sq feet. Both get about 6 hours of sunlight. The garden beds are further away from the house and the rain barrels. By next fall I expect both the gardens and my biceps to grow a little from hauling water. Both of which I am ok with.
For you, where could you grow a garden? If you prefer a larger garden but don’t have a backyard, could you join a community garden? How can you make the best of what you have work for your goals?
3. Test soil
I did get the soil tested for lime and nutrient recommendations because these tests for North Carolina home owners is free during certain times of the year. If you are able to, Green America advises to test the soil for toxins and contaminants like heavy metals as well.
Depending on where your garden is located, the soil may have pollutants that do not make it safe to grow food. For more information, please read this article from NC State’s extension office about minimizing risks of soil contaminants. Your local co-op is an excellent resource for additional concerns about soil testing in your area. They may also provide you contact details for licensed soil scientists in your area who may help you further.
4. Prepare area for garden bed.
Part of growing up with gardens was helping weed them. I don’t really enjoy weeding I also do not want to use chemicals like herbicides to kill them. This article from Old Farmer’s Almanac is about a no dig/no till garden that requires minimal weeding without chemicals. The idea of less weeding while still being able to grow food had me excited.
In the no dig/no till method thick layers of compost and mulch are spread directly on top of soil. These thick layers of material blocks light from reaching weeds in the soil below preventing them from growing. The compost and mulch are nutrient rich layers that you plant directly into. By planting into the thick compost layer, you leave the soil below undisturbed. Soil that is not dug into or tilled is healthier because it allows soil microbes to continue to thrive.
In addition to the other benefits of no dig/no till gardens, when soil is not disturbed, carbon stored in the soil stays in the soil. This a very important benefit of no till gardening because carbon sequestration is a way of addressing climate change. Plants are like little carbon dioxide vacuums. During photosynthesis, plants pull carbon dioxide from the air and convert carbon dioxide into carbon filled sugars. Thus these carbon filled sugars are no longer carbon dioxide in the air contributing to climate change. Rather, they are carbon stored in the plant and in the roots of the plant in the soil.
No Dig/No Till Garden Set Up
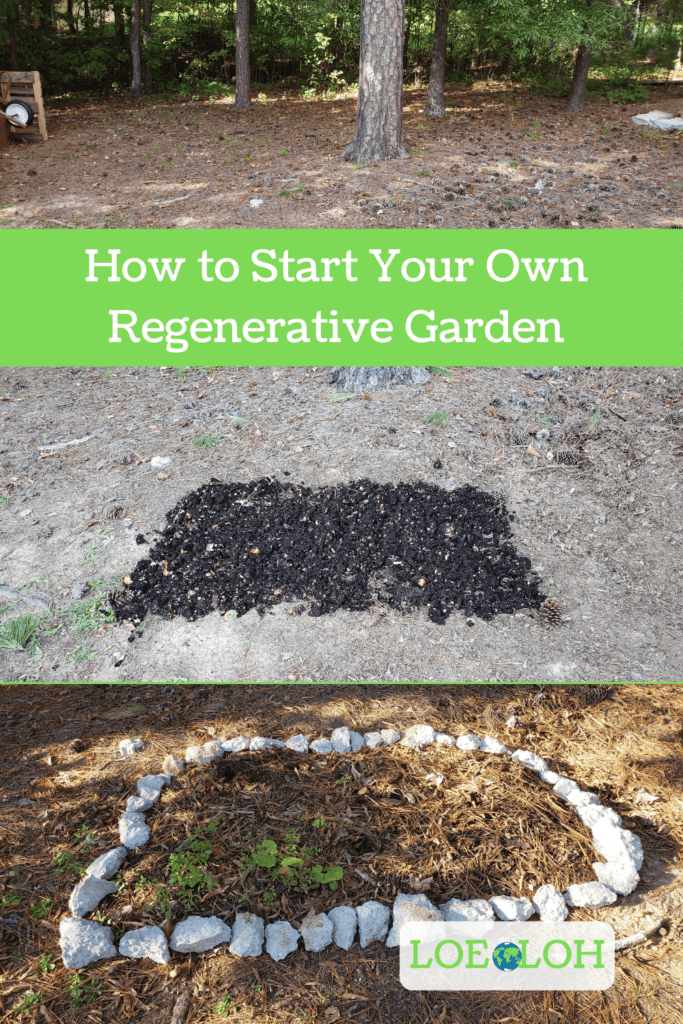
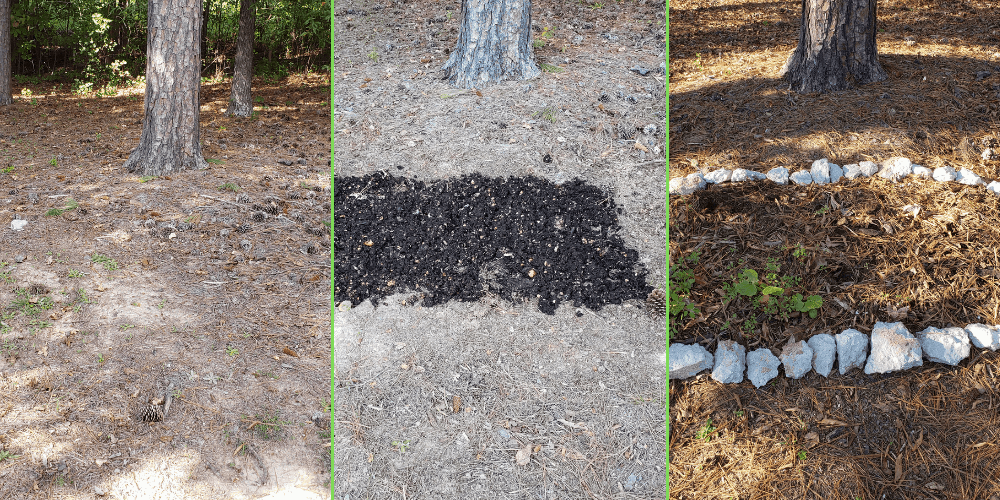
To set up your no dig/no till garden bed start by clearing the area for your garden bed. Remove any rocks or plant materials like pinecones and sticks. If there are a lot of weeds you may lay down a single layer of wet cardboard on top of the soil. Make sure the cardboard is not glossy, remove any plastic tape, and overlap the edges of cardboard.
On top of the cardboard or on the soil, spread out at least 4 inches of compost. You may cover the compost with about 2 inches of wood chips or hay but this final layer is optional as well. If you add this final layer, try not to mix it with the compost below when spreading. This additional layer provides more nutrients to the plants. You may also build a barrier around the bed to help contain the thick compost and mulch layers.
The Old Farmer’s Almanac notes that once the bed is prepared it may take several months to a year before the bed can be used. Once the bed is ready to be used, plant directly into the compost layer below the mulch.
For my garden beds, I did not put down a layer of cardboard. After spreading about 2-4 inches of compost, I did add hardwood chips on top as mulch. If you choose to use wood chips I do not recommend using wood chips that are dyed.
5. Plan Out Plants
Depending on what your goals are I would recommend choosing plants that are native to your area and or perennial when possible. Native plants tend to be more resilient and low maintenance. Do make sure to stay away from invasive plants. Invasive plants are non native plants that have adapted to the area and have detrimental effects on the environment.
Also note if the plant is a perennial or an annual. Perennials usually come back year after year without having to replant them. While annual plants need to be planted every year. Several vegetable plants are annuals, and this is good for crop rotation year to year. Crop rotation is a technique that increases plants resilience to pests and keeps your soil fertile.
Plan for Vegetable Garden
Tomatoes: Annuals. Seed need to be germinated inside and then transplanted into the garden. The Old Farmer’s Almanac provides an estimated date to start seeds and when to transplant based on your zip code.
Bell Peppers: Annuals. Seed need to be germinated inside and then transplanted into the garden. The Old Farmer’s Almanac provides an estimated date to start seeds and when to transplant based on your zip code.
Garlic: Perennial. Plant sprouted cloves in the fall. Recently planted 5 cloves from a grocery store garlic in which some of the cloves were moldy (Lemonade out of lemons). Followed these instructions from Old World Garden Farms.
Plan for Pollinator Garden
Bee balm: Native to NC. Perennial. Plant seeds in spring or fall. Plant grows rapidly, choose location carefully.
Butterfly milkweed: Species name Asclepias tuberosa. Native to NC. Perennial. Plant seeds in fall because seeds need cold weather to germinate.
Goldenrod: Native to NC. Perennial. Plant seeds in fall or spring. Easy to grow (I like this) Garden Design provides slide of photos near the bottom of their page that goes through several varieties. Right now, I’m leaning towards the Fireworks (Solidago rugosa), Bluestem Goldenrod (Solidago caesia) do well in dry shady areas or Showy Goldenrod (Solidago speciosa) because it does well in clay soils.
For your garden, what about plants do you like? What vegetables or fruit do you like to eat? What produce could you grow to save some money? Is there a native pollinator plant that the flower is your favorite color?
Green America’s #1 tip for beginner gardeners “is to have fun and not take the process too seriously.” Start your regenerative garden with me and let’s enjoy growing our gardens together. Follow me on Instagram for more regular updates on my regenerative garden.


