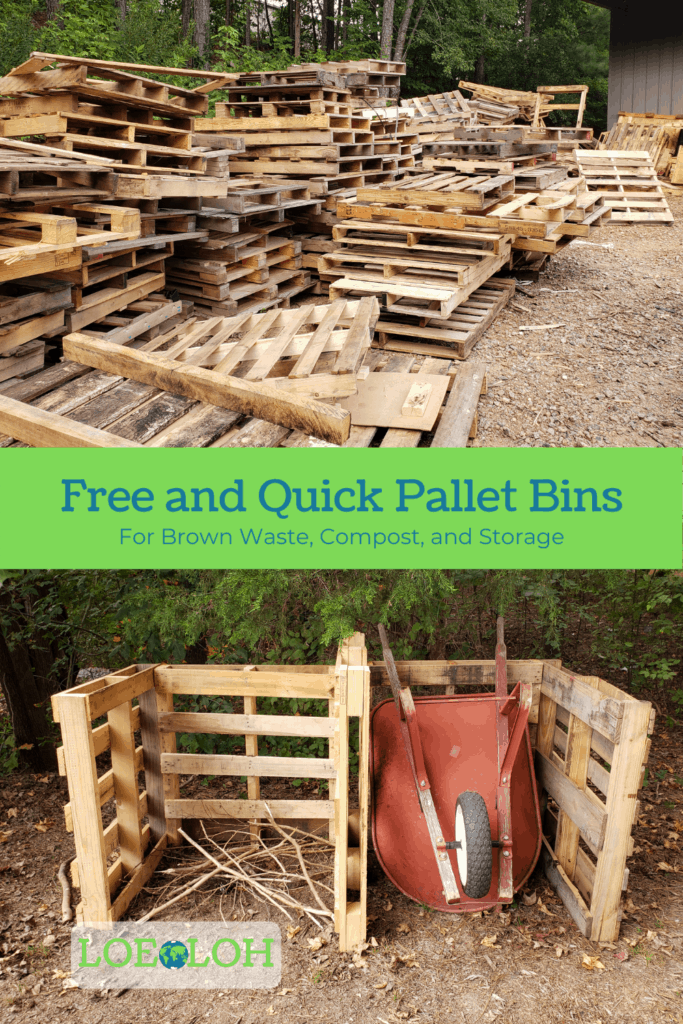
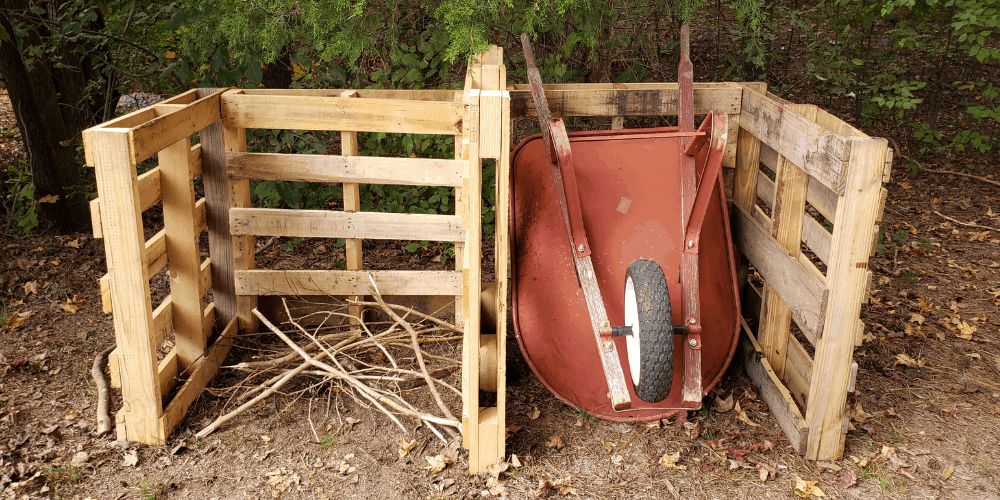
While troubleshooting our compost, I realized we needed to add more brown waste. The issue for John and I was having brown waste available year round. We usually put in brown waste during the fall from raked up leaves. However, compost needs brown waste the other 3 seasons of the year too. My idea was to set up an area to collect brown waste for easy access throughout the year. So, we built pallet bins. These pallet bins are a free and quick project.
Using a power tool is optional in this quick build. We used a power drill to insert screws to hold the ends of the pallets together. If you don’t have a power drill, you may use zip ties or rope to keep your pallets together as well.
Once we had all of our supplies, these pallet bins took only about 30 minutes to build! Let’s get building.
Supplies
- At least 3 Wood Pallets, for every bin you need an additional 2 pallets.
- Tape Measure
- Hammer
- Protective Gloves (like thick gardening gloves)
Additional Supplies
- Power Drill
- At least six 2” long outdoor wood screws. Wood screws have a coarser thread to grip the wood. We used 3” outdoor wood screws.
- Instead of screws, you can use rope or zip ties to connect the pallets together.
Tips
Use protective gloves when handling wood pallets. Often the wood in the pallets have splinters or rusty nails. Protective gloves help prevent injury.
Instructions for Pallet Bins
1. Find pallets
It is likely there are stores near you who are trying to get rid of their wood pallets either by selling them for a small fee or giving them away for free. We found our wood pallets for FREE 😊 on Craigslist. Be careful when purchasing or picking up items from Craigslist.
2. Choose pallets
Carefully choose at least 3 pallets about the same size. To build one bin, you need at least 3 pallets. For every additional bin, you need at least 2 more pallets. I wanted two bins for flexibility of storage, so we got 5 pallets about the same size. This is where the tape measure was quite handy. Our pallets are all about 32”x36”. If you have a honey hole of wood pallets, try to choose pallets where most of the wood pieces are intact and it isn’t too rickety. Pallets are not meant to be structural pieces. However, you want your pallet bins to be somewhat sturdy. Again, I recommend using protective gloves when handling pallets to prevent cuts from rusty nails or wood splinters. No fun.
Additional safety concerns about pallets
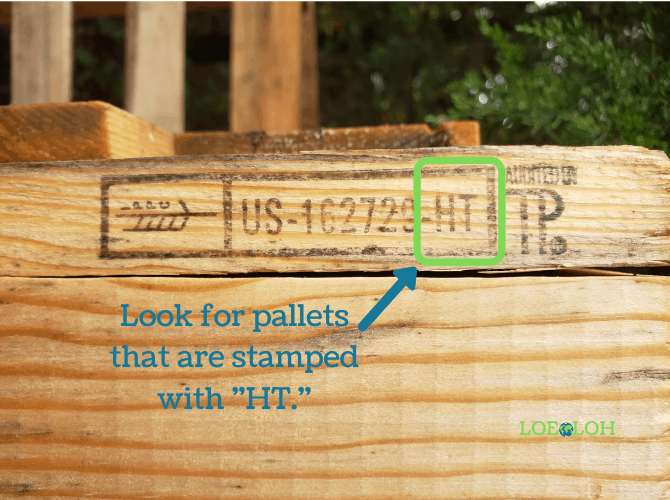
Pallets are treated to prevent insects to be transferred as the pallets are shipped internationally. So make sure your pallet is stamped “HT.” HT means the wood pallet was heat treated to prevent insects. DO NOT use pallets marked “MB.” MB stands for methyl bromide a strong insecticide that is extremely toxic to humans. If the pallet is unmarked, it is difficult to determine if the wood was ever treated before. It is safer to not use unmarked pallets. Also, I would NOT recommend choosing pallets that have stains or look like something has spilled on them. Check out more tips on how to choose pallets from A Piece of Rainbow.
3. Remove Rusty Nails or Broken Wood
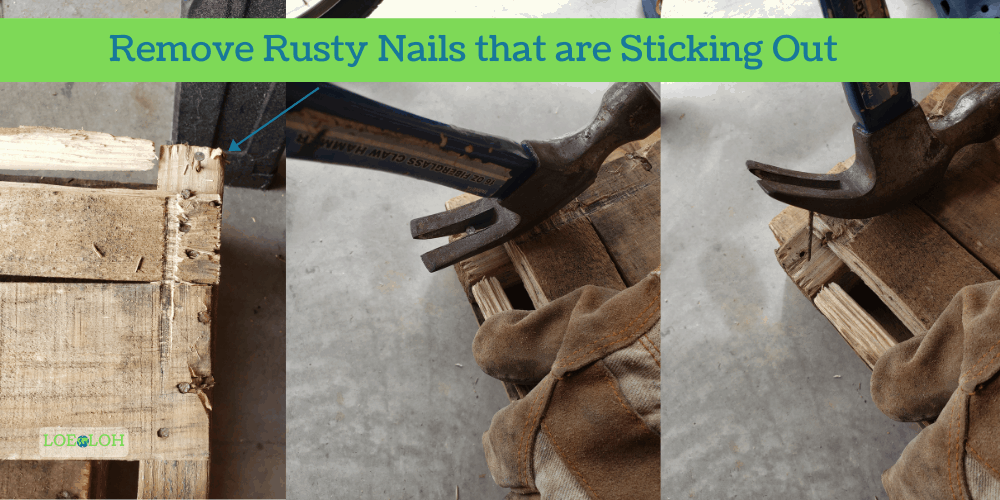
Once you get your pallets home remove rusty nails that are sticking out to prevent cuts. You may also choose to hammer the nails in further. Carefully remove broken wood pieces as well to prevent splinters. Safety first.
4. Choose where you want your pallet bins to live
We chose a part of our yard that was close to our compost bin but far enough away from the house we didn’t see a lot of the pallet bins once built. The pallet bins are more functional than pretty.
5. Layout the pallets
This helps space them out. Something important to think about when you lay out the pallets are the boards in the middle. The boards in the middle will be where you place the screws to connect the wood pallets together.
6. Stand up pallets and adjust
Initially, where we had the pallets standing up, the ground was uneven. So we shifted the pallets over slightly to more even ground. When you stand the pallets up, you want them arranged so when looking at the pallets from above they make a M Shape.

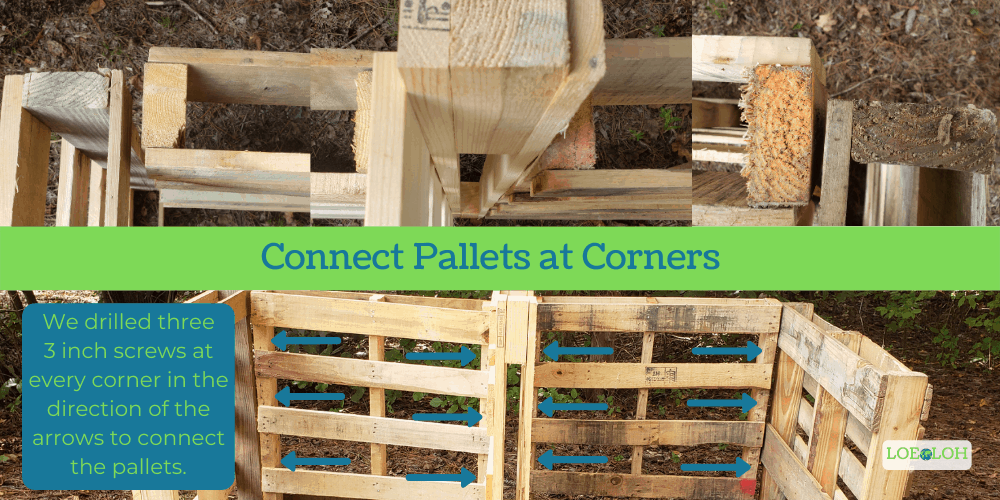
7. Connect the pallets together
We initially were drilling pilot holes but our drill bit broke about half way and we didn’t have a replacement. Pilot holes help prevent the wood from splitting when you are drilling in the screw. You don’t necessarily need pilot holes as we were able drill the remaining screws needed. We drilled in three 3” screws at every corner of the bin.
If you do not have a power drill, use rope or zip ties to tie around the corners of your bin where the pallet ends meet.
8. Optional: Add some sticks at the bottom of your bin
If you live in an area that gets a good bit of rain, add some sticks at the bottom of your bin. The sticks will create a pocket of air at the bottom. This pocket of air keeps brown waste dry or for compost, adds air. We’ve mentioned the importance of air in compost before. It is good to keep brown waste dry because dry brown waste helps offset the moisture in green waste in your compost bin.
9. Stand back and Enjoy!
Right now we use our pallet bins to store our wheelbarrow. The trees in our yard have not dropped their leaves yet. I will add some pictures once we get to add our fallen leaves. P.S. I am a little excited to rake this year. (Don’t tell John 😉).
Here are a few items I do not recommend adding to your brown waste
- Grass clippings or plant trimmings that have been chemically treated (fertilizer, pesticide, herbicide, etc.).
- Plant trimmings or leaves from a diseased plant.
- Paper with color ink.
- Glossy paper.
Some people include paper products with color ink. However, I am skeptical about paper products with any ink. Instead, we recycle all paper products.
Things I like most about this pallet bin project
- Free or extra cheap, depending on the pallets, screws, rope or zip ties you may have. If you do not have a power drill, I recommend asking a friend or family member to borrow one or see if they might help with the build.
- Project level: Easy.
- Flexibility. You can build how ever many bins you want by adding 2 more pallets in an L shape. You may also connect the pallets with screws, rope, or zip ties.
These free and quick pallet bins can be used for brown waste storage like we are using them for. They may also be used to build your own compost bin. We already have a compost tumbler, so we do not need an additional compost setup. If you would like to learn how to use your pallet bins to compost, I recommend following these instructions.
How are you going to use your pallet bins?
